Installing Subway Tile Backsplash : Installing a subway shower surround & marble floor (and grouting it) speaking of installing tile, we're bound to have a.
Installing Subway Tile Backsplash : Installing a subway shower surround & marble floor (and grouting it) speaking of installing tile, we're bound to have a.. Then i also measured and marked a vertical line in the middle of the range opening. After removing the old cabinet it wasn't exposed brick but mortared over the brick and the exposed corner of the chimney is now a sharp radius. Installing a subway tile backsplash: If you still have any mastic or mortar still on the wall, you need to go back and work more on the tile removal process. Move appliances out of the way and cover the surrounding area to protect adjacent surfaces.
Notched trowel (to spread adhesive) margin trowel (for mixing material) tile spacers. We chose the 12 inch subway tiles, but all of these steps would work the same for the 6 inch tiles. Marble darkens considerably when wet. How to install subway tile backsplash step by step: Doing a kitchen remodel is a great way to make your home look n.
Kitchen Backsplash In A White 3x6 Subway Tile In A Vertical Herr White Subway Tiles Kitchen Backsplash Beveled Subway Tile Backsplash White Subway Tile Kitchen from i.pinimg.com While it will take some time on your part, you don't have to be a professional to learn how to install a backsplash. How to install subway tile in your kitchen with tips and tricks for a flawless installation. If not, consider installing a tile backer board first. Installing a penny tile backsplash in our last kitchen (getting started, cutting tiles, grouting, removing haze) removing an old shower tile border and installing a new one; After removing the old cabinet it wasn't exposed brick but mortared over the brick and the exposed corner of the chimney is now a sharp radius. Now it's time for the fun part of this subway tile backsplash diy — actually applying the tile to the wall. To install subway tile backsplash, measure the wall, calculate the number of tiles needed to cover it, and buy 10% more tile than you need to account for waste. Put your tile and tile adhesive in the room you are going to be installing and maintain the temperature at 70 degrees or more for a full 24 hours before you start this how to install a subway tile backsplash.
If not, consider installing a tile backer board first.
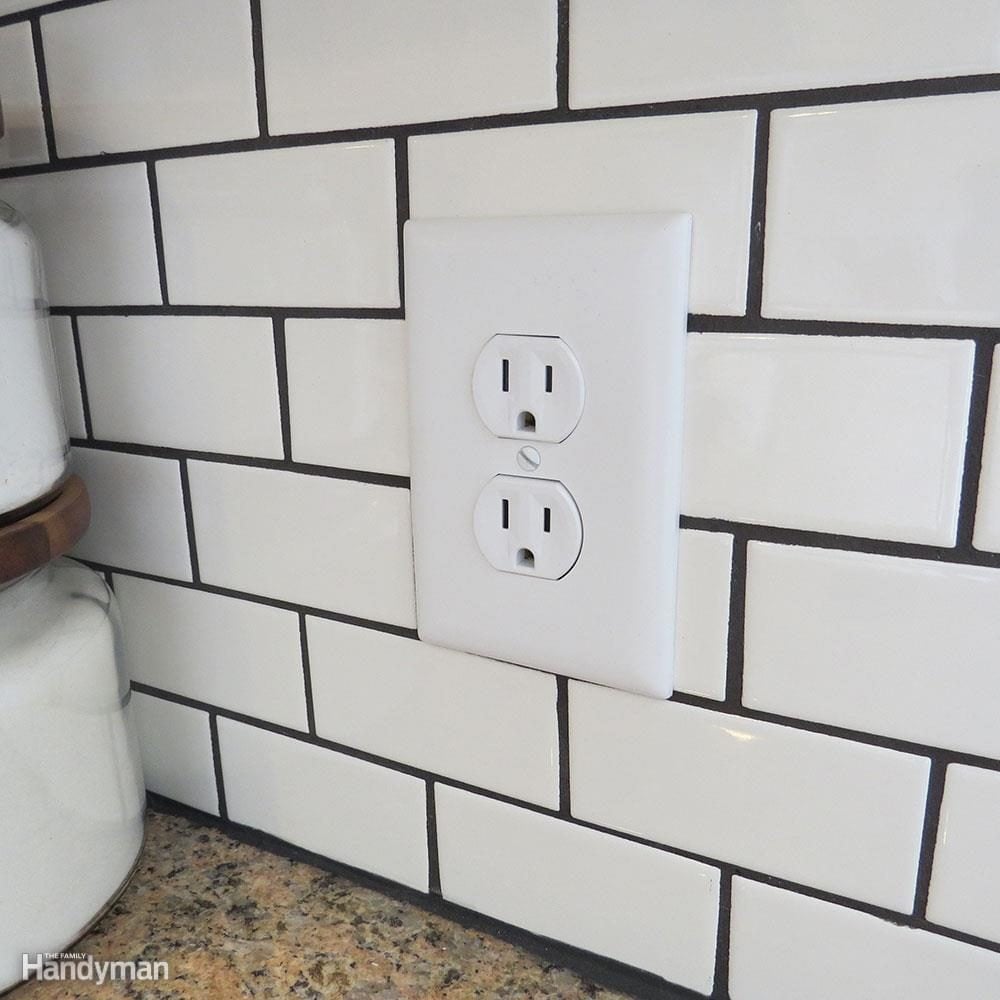
Rubber grout float (for applying grout) sponge. I'll admit, i completely freaked out. This helps everything to acclimate and produce a better result. Notched trowel (to spread adhesive) margin trowel (for mixing material) tile spacers. Installing a penny tile backsplash in our last kitchen (getting started, cutting tiles, grouting, removing haze) removing an old shower tile border and installing a new one; Begin by laying out an old towel or sheet over your countertop for protection. How to install subway tile in your kitchen with tips and tricks for a flawless installation. It took me about two days to complete, and cost less than $200. After three years living in our house, we finally decided it was time to install a subway tile kitchen backsplash! Installing a subway tile backsplash increases the distance from the outlet box behind the drywall and the face of the interior wall. Subway tiles can be laid in a variety of pattern, and not all the tiles need to be the same color, accents can help spice up a bland look. In some cases, this additional thickness causes the screws on the outlet or switch to be too short to firmly attach to the outlet box. Top angebote für küche & haushalt.kostenlose lieferung möglich
Installing a subway tile backsplash: The classic, understated look of subway tile is extremely versatile and can be incredibly inexpensive for a basic variety. Rubber grout float (for applying grout) sponge. Doing a kitchen remodel is a great way to make your home look n. I know the 1/2 offset/brick layout is the standard approach with subway tile but, am i crazy to think.
How To Install Subway Tile Installing Tile Backsplash For The First Time Crafted Workshop from images.squarespace-cdn.com Before you begin tiling, check out the existing surface you'll be working on. Move appliances out of the way and cover the surrounding area to protect adjacent surfaces. They've come back and told us that a 1/2 offset is industry standard for backsplash subway tile and that 1/3 is standard for floor tile. I am installing subway tile for a backsplash in our kitchen. In some cases, this additional thickness causes the screws on the outlet or switch to be too short to firmly attach to the outlet box. How to install a simple subway tile kitchen backsplash. When we removed the old cabinets we knew there was a chimney in one corner. If you still have any mastic or mortar still on the wall, you need to go back and work more on the tile removal process.
In some cases, this additional thickness causes the screws on the outlet or switch to be too short to firmly attach to the outlet box.
Installing a subway tile backsplash: How to install a subway tile backsplash. This helps everything to acclimate and produce a better result. It took me about two days to complete, and cost less than $200. Now it's time for the fun part of this subway tile backsplash diy — actually applying the tile to the wall. After three years living in our house, we finally decided it was time to install a subway tile kitchen backsplash! You can see in the photo below how the water was seeping. Just as we discussed in the last step, you'll want to: Comb the trowel through it. How to install subway tile backsplash step by step: I know the 1/2 offset/brick layout is the standard approach with subway tile but, am i crazy to think. Establish the perimeter of the area you'll cover, and apply painter's tape to the walls to mark the edges. They are perfect for backsplashes in kitchens that.
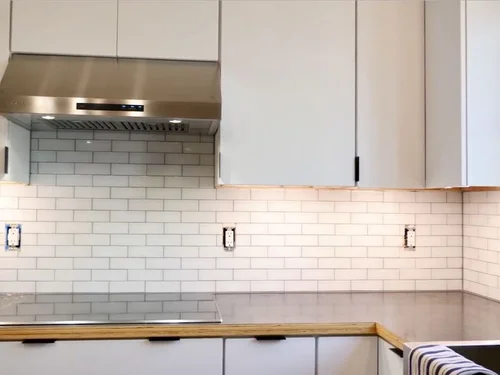
I know the 1/2 offset/brick layout is the standard approach with subway tile but, am i crazy to think. Establish the perimeter of the area you'll cover, and apply painter's tape to the walls to mark the edges. Marble darkens considerably when wet. Depending on the tile that is to be installed, and where it will be installed, it is sometimes approp. I started this wall by marking a level line about 1/8 inch from the top of the countertop.
Dos And Don Ts From A First Time Diy Subway Tile Backsplash Install Family Handyman from www.familyhandyman.com When we removed the old cabinets we knew there was a chimney in one corner. Go slightly higher than the tile height. In some cases, this additional thickness causes the screws on the outlet or switch to be too short to firmly attach to the outlet box. Ok, now i just screwed back on the faceplates, and called this project a wrap. Though tile is the most common material used, there can also be textured paints, vinyl applications, wallpapers, and even metal sheeting up on the wall. It took me about two days to complete, and cost less than $200. Then i also measured and marked a vertical line in the middle of the range opening. I know the 1/2 offset/brick layout is the standard approach with subway tile but, am i crazy to think.
To install subway tile backsplash, measure the wall, calculate the number of tiles needed to cover it, and buy 10% more tile than you need to account for waste.
How to install subway tile backsplash How to install a subway tile backsplash. If not, consider installing a tile backer board first. How to install tile backsplash. Tips on how to install subway tile kitchen backsplash. How to install a ceramic subway tile backsplash around a window. Just as we discussed in the last step, you'll want to: Tiling a backsplash adds an element of style to any kitchen. Then i also measured and marked a vertical line in the middle of the range opening. Explore 200+ beautiful kitchen backsplash ideas comprising all different materials, colors and designs. When we removed the old cabinets we knew there was a chimney in one corner. I'll admit, i completely freaked out. After removing the old cabinet it wasn't exposed brick but mortared over the brick and the exposed corner of the chimney is now a sharp radius.
Installing a penny tile backsplash in our last kitchen (getting started, cutting tiles, grouting, removing haze) removing an old shower tile border and installing a new one; installing subway tile. It was so gray and not the light, pretty backsplash i had envisioned.


0 Komentar